
Now we’ll learn three basic sewing stitches…which is two more than I knew when I first began sewing be-you-tee-ful Barbie doll clothes! These are the only stitches you will need if you are doing the throw pillow project, and are a great starting place if you want to go on to learn quilting, embroidery, and other hand sewing.
The Running Stitch
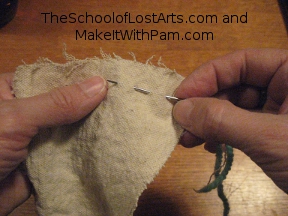
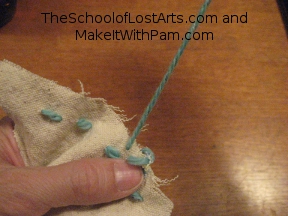
The first is the basic stitch everyone learns first: the running stitch. It has that name because the needle runs up and down through the fabric as you sew.
I am demonstrating these stitches with yarn, so that you can see what I’m doing. You’ll be using thread instead, so your stitches will be smaller. (It’s okay to start out with big stitches around a quarter inch or half inch long as you are first starting out. Try to get them shorter as you learn to control the needle better. Around an eighth of an inch long is a good goal!)
If you are right handed, you’ll be stitching from the right to the left, with the cut edge of the fabric away from you. Lefties will hold the fabric the same way, but stitch from the left to the right.
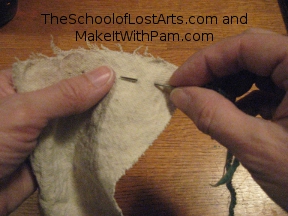
Bring your knotted thread up through the fabric from the back. Aim for your seam to be around a half inch from the edge of the fabric. You can mark this with a pencil line if you want. Pass the point of the needle to the back side of the fabric, then back to the front, like you are pinning something with a safety pin.
Keep moving the needle down the line of stitching…up at A, down at B, up at C, down at D.

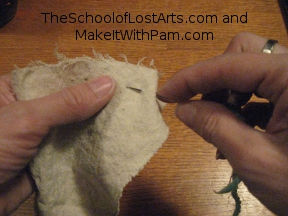
You can also “load” several stitches on the needle before pulling it through.
Carefully pull the needle through the fabric until the thread has all passed through the fabric. The knot you tied in the previous step will stop the thread from pulling completely through.

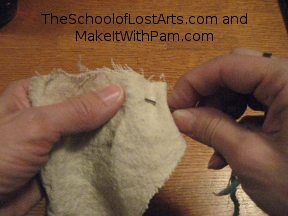
Don’t pull it too tight, or your seam will pucker. In the same way, don’t leave big loops of thread, or your seam will pull apart.
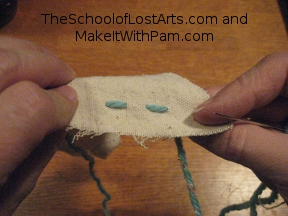
Gently pull the thread barely snug, and it will be perfect!
The Back Stitch
Now I’ll teach you a hand stitch that makes as tight of a seam by hand as you would get on a sewing machine – and it doesn’t take much longer!
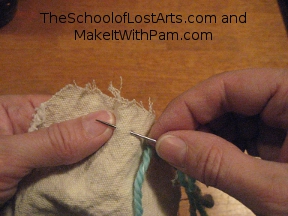
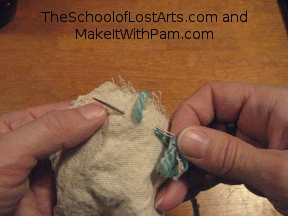
Bring your needle from the back of the work to the front. Make the first stitch as if you were going to do a running stitch.
However, for the second stitch, instead of moving forward down the line of stitching, you will stagger backwards and move forward on the back side of the fabric. Sort of a two steps forward, one step back thing.
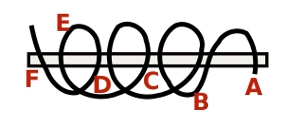
- The setup stitch: Up at A, down at B, up at C;
- The first back stitch: Down at B, up at D;
- The second back stitch: Down at C, up at E;
- The third back stitch: Down at D, up at F.

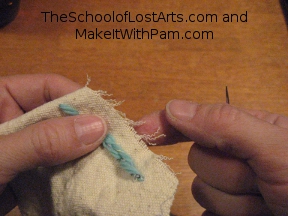
Continue in the same manner until you’ve reached the end of the line of stitching.
The looping motion of this stitch draws the fabric layers together tightly, so it makes a very secure seam. The back side of the fabric will look different than the front.
.
The Overcast Stitch

I like to wash my throw pillows. In part, that’s because I have dogs who think that the pillows are meant for them to lie on. In part, it’s because pillows just happen to get dusty and dirty from time to time. So I designed this easy project to involve removable covers so you can wash them and put them back on, any time you want.
And, since I will wash the completed pillow covers, I wash the fabric before I begin my project. This not only removes any processing chemicals and sizing, it also gets rid of any fabric shrinkage that might occur. Thus I won’t end up with a pillow cover 10% too small after the first wash!
With all this washing, the cut edges of the fabric will tend to fray, destroying all your work in the washing machine! If you use the overcast stitch, this will not happen. I overcast the cut edges of the fabric before washing, and the raw edges of the pillow seam allowances as well.
The overcast stitch is done about 1/4 inch from the edge of the fabric. Stitch length is not important, but the stitch will be most effective if your stitches are no more than 1/2 inch apart. Aim for somewhere between 1/4 inch and 1/2 inch. Go closer if it’s a ravely fabric (threads at edge pull out easily), or a little further apart if the weave is fairly firm.
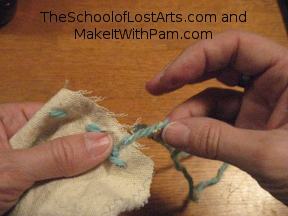
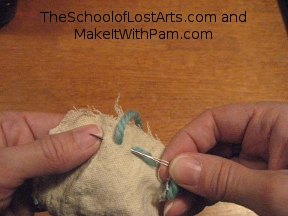
Bring the needle up from the back 1/4 inch from the edge of the fabric.
Then, move 1/4 to 1/2 inch down the fabric, and bring the needle up from the back again, letting the thread gently wrap around the edge of the fabric. Keep doing this all the way down the edge of the fabric.

Be careful not to pull the thread too tight, or you will end up with a scalloped edge (it will look like a chain of parenthesis).

Easy, right? This is how they finished seam edges in the old days. 🙂
Are you a visual person who likes to see it in action? Check out my video of these three easy, but essential, stitches.
Ready to move on? Next up: Securing your stitches so they don’t come out!
